You know that feeling? You’re craving a delicious chicken dinner, but you dread the potential outcome: dry, bland, or just… disappointing. I get it! So many of us have been there. But what if I told you that you can learn How To Make Chicken Like A Pro right in your own kitchen? It’s all about a few simple, game-changing techniques that guarantee juicy, flavorful, and perfectly cooked chicken every single time. My passion is making cooking accessible and enjoyable for everyone, and this method is proof that professional results are totally within reach!
Why You’ll Love This Easy Chicken Dinner Method
Seriously, this way of cooking chicken is a total game-changer. You’re going to love it because:
- It guarantees super juicy chicken, no more dry bites!
- The flavor is absolutely fantastic – so satisfying.
- You’ll end up with perfectly cooked chicken, tender and delicious every time.
- It’s surprisingly easy and comes together really quick, perfect for busy weeknights.
- This method builds so much kitchen confidence; you’ll feel like a pro in no time!
Essential Ingredients for How To Make Chicken Like A Pro
Alright, for this amazing chicken dish, you don’t need a ton of fancy stuff. Just a few simple things that make all the difference. Trust me, these are the stars of the show:
- 1 to 4 boneless, skinless chicken breasts: Make sure they’re roughly the same size so they cook evenly. That’s key for that pro-level finish!
- Kosher salt: A good pinch is essential for bringing out the chicken’s natural flavor.
- Freshly ground black pepper: Adds just the right little kick.
- 1 tablespoon olive oil, unsalted butter, or a mix: This is what gives us that beautiful golden crust and helps everything cook smoothly. Honestly, a little of both olive oil and butter is my favorite trick here!
Mastering the Technique: How To Make Chicken Like A Pro Step-by-Step
Alright, let’s get down to business! This is where the magic happens, and where we turn simple chicken breasts into something truly special. It’s not complicated, I promise. It’s all about a few key steps that make a *huge* difference. I learned these tricks in a busy kitchen, and they’ve never failed me. Ready to roll up your sleeves?
Preparing the Chicken for Perfect Results
First things first, we gotta get our chicken ready. Grab those chicken breasts and, if they’re a bit uneven, just give them a gentle pound. You can use the flat bottom of a jar, a thick glass, or even a small frying pan to do this. We want them to be about the same thickness all over – this is *so* important because it means they’ll cook evenly. No more one side dry and the other still pink! Once they’re looking uniformly nice, give them a good sprinkle of kosher salt and then some freshly ground black pepper. Don’t be shy with the seasoning; it really wakes up the chicken’s flavor!
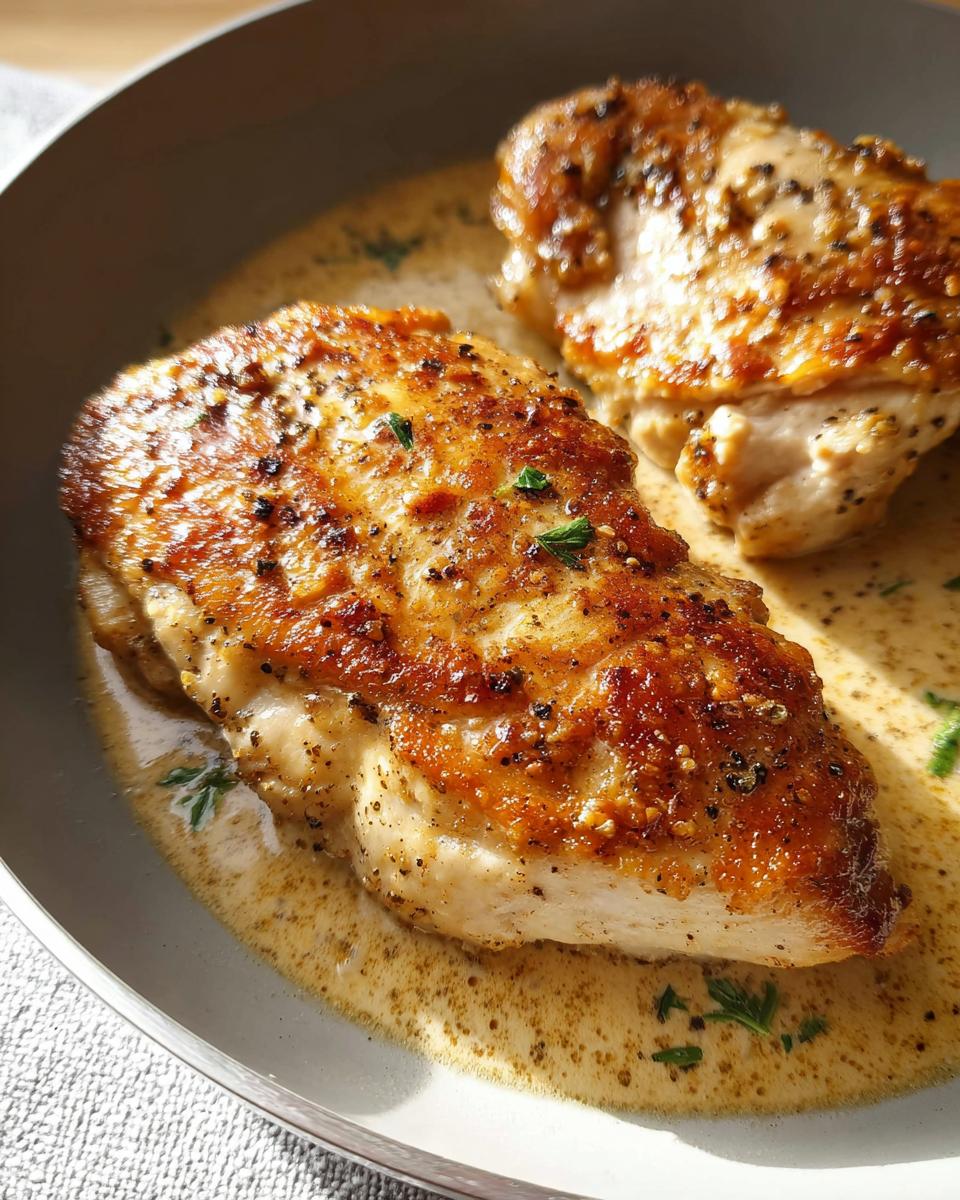
Achieving Golden Perfection: Searing and Initial Cook
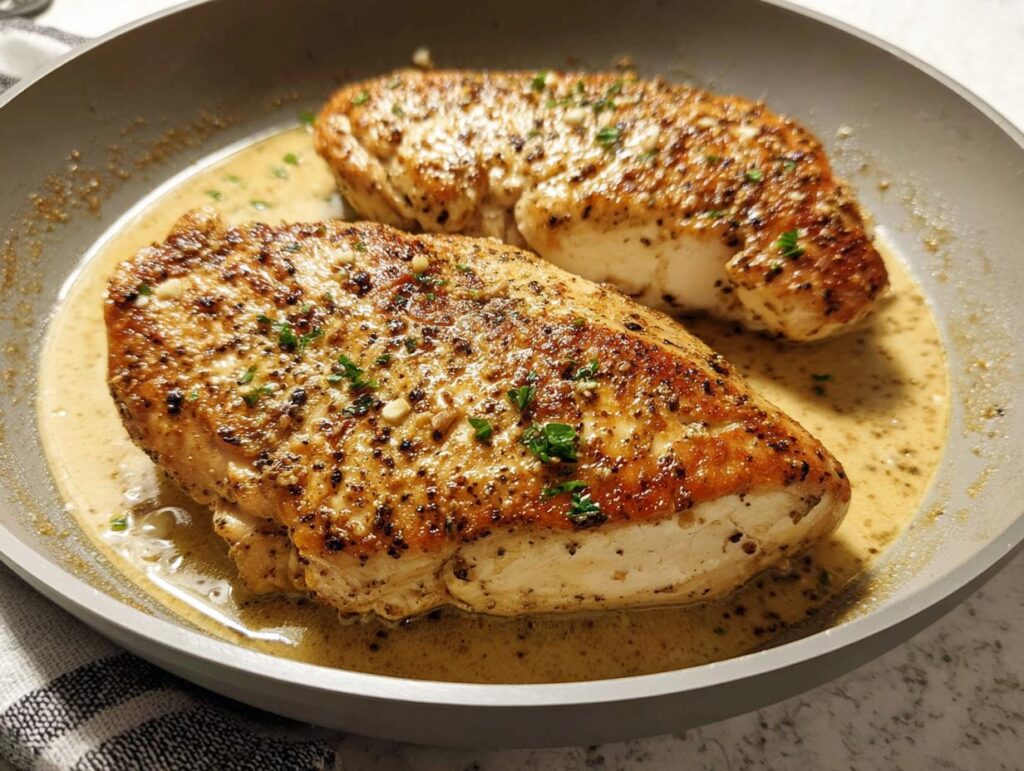
Now, let’s get that pan nice and hot. You want a frying pan that’s big enough so your chicken pieces aren’t crowded – they need a little breathing room! Turn the heat up to medium-high. Add your olive oil, butter, or that glorious combo of both, and swirl it around so the bottom of the pan is coated. Let it get hot but not smoking. Carefully place your seasoned chicken breasts into the pan. Here’s a pro move: let them cook for just about 1 minute without touching them. This is what gives you that gorgeous, light golden color and starts building flavor.

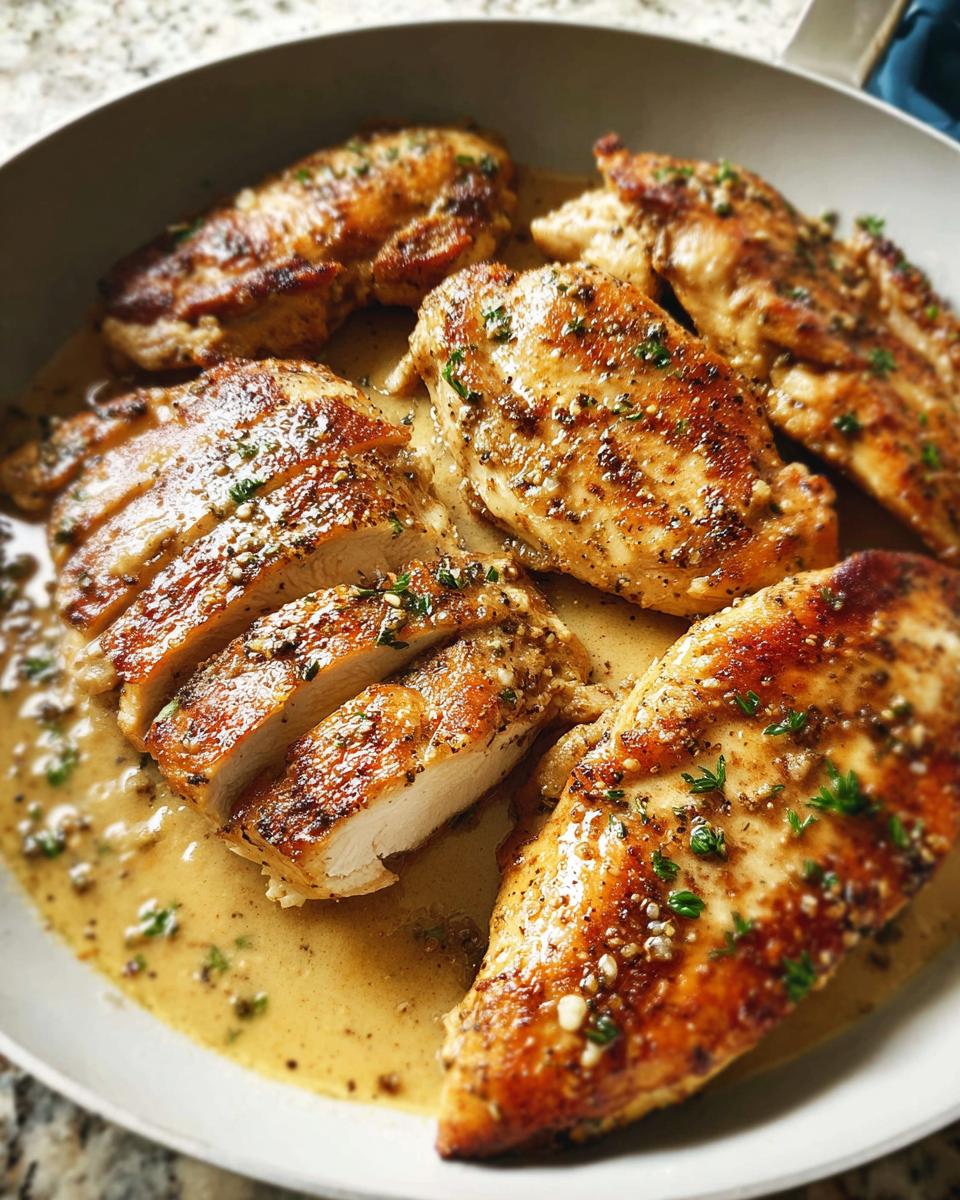
The Secret to Juicy Chicken: Covered Cooking and Resting
After that minute is up, carefully flip each chicken breast over. Now, this is a crucial part of How To Make Chicken Like A Pro: reduce the heat to medium-low. Pop a tight-fitting lid on your pan. Let them cook like this for about 10 minutes – and seriously, resist the urge to peek! The steam trapped inside is what keeps the chicken incredibly moist. Once those 10 minutes are up, turn off the heat completely (or pull the pan off an electric burner). Now for the *real* waiting game: set a timer for another 10 minutes and just let the chicken sit, covered, in the pan. No peeking! This is its resting period, letting all those delicious juices redistribute. After it rests, uncover and pop an instant-read thermometer into the thickest part. You’re looking for at least 165°F (74°C). If it’s there, you’ve done it! Slice it up and enjoy that perfectly juicy chicken!
Expert Tips for How To Make Chicken Like A Pro Every Time
Okay, so we’ve gone through the steps, but let’s chat about a few things that *really* take your chicken from good to absolutely incredible, like a true pro. These little tweaks make all the difference, trust me!
Ingredient Quality Matters
You wouldn’t believe how much using good ingredients helps. Start with the best chicken you can find – really fresh is always best. And for the fat? Butter brings amazing flavor, but it can burn. Olive oil has a higher smoke point. Using a mix gives you the best of both worlds: fantastic flavor *and* less chance of burning. It’s a small thing, but it matters for that delicious golden finish.
Temperature is Key for How To Make Chicken Like A Pro
Seriously, temperature management is *everything* when you’re learning How To Make Chicken Like A Pro. That initial medium-high heat is crucial for getting a nice sear, creating that tasty crust. But then, bringing it down to medium-low with the lid on? That’s the secret to cooking it through gently, keeping it juicy. And don’t forget the thermometer! Hitting that 165°F (74°C) isn’t just about food safety; it’s the pinpoint for perfectly cooked, never-dry chicken. It takes the guesswork right out of it.
Equipment Needed for Professional Chicken Cooking
To get that perfect, juicy chicken every single time, you really only need a few star players in your kitchen. Don’t worry, it’s not anything too fancy! First up, you’ll want a good frying pan. I prefer one with a heavy bottom, like cast iron or stainless steel, because it holds heat really well and distributes it evenly. This helps everything cook beautifully without hotspots. You’ll also need a reliable, tight-fitting lid for that pan – this trap is crucial for steaming the chicken perfectly. And finally, a trusty instant-read thermometer is your best friend here. It’s the only way to know for sure when your chicken is cooked to that ideal 165°F (74°C) without cutting into it and losing those precious juices!
Serving Suggestions for Your Perfectly Cooked Chicken
Now that you’ve got that incredibly juicy, flavorful chicken, what do you serve with it? Oh, the possibilities are endless and so delicious! For a quick and healthy weeknight dinner, you really can’t go wrong with some roasted veggies. Think broccoli florets tossed with a little olive oil, salt, and pepper, or maybe some asparagus spears. A simple side of fluffy quinoa or some easy mashed potatoes also make it feel like a restaurant-quality meal. If you’re feeling a bit fancier, a light, lemony vinaigrette over some fresh greens is always a winner. Honestly, this chicken is so versatile, it’ll make almost anything you pair it with taste amazing!
Storing and Reheating Your Pro-Style Chicken
So, you’ve got some amazing chicken left over? Lucky you! To keep it tasting just as good tomorrow, pop it into an airtight container. You can store it in the fridge for up to 3-4 days. When you’re ready to reheat, try not to blast it on high heat, as that can dry it out. Gently warm it up in a covered pan over low heat with a splash of broth or water, or even pop it in the oven at a low temperature for a few minutes. The goal is to warm it through without cooking it further and losing all that wonderful juiciness we worked so hard for!
Frequently Asked Questions About How To Make Chicken Like A Pro
Got questions about getting your chicken just right? I totally get it! Cooking chicken can feel tricky sometimes, but this method really makes it simple. Here are a few things people often ask:
Can I use chicken thighs instead of breasts for this recipe?
Oh, absolutely! Chicken thighs are super forgiving and tend to stay moist. If you’re using boneless, skinless thighs, they’ll probably cook a little faster than breasts. Just keep an eye on that thermometer – you’re still aiming for that 165°F (74°C) internal temperature. They might need a bit less than the 10 minutes covered cooking time, so start checking them a little earlier.
What if my chicken isn’t cooked through after resting?
No worries, it happens! The resting part is mostly to let juices settle, but if it’s not quite done, just pop it back in the pan over low heat, cover it again for a few more minutes, and check the temperature. Sometimes, chicken breasts can be wildly different in thickness, even if you try to even them out. Just cook it until it reaches that safe 165°F (74°C) and you’re good to go!
How do I prevent the chicken from sticking to the pan?
Preventing sticking is key to getting that nice golden crust and easy cleanup! Make sure your pan is properly heated before you add the fat (oil or butter). Let the fat get hot, but not smoking. Also, when you first put the chicken in, let it cook for that full minute without moving it; that initial sear helps create a barrier. And using enough fat in the pan makes a huge difference too!
Is this method good for making chicken for meal prep?
Definitely! This How To Make Chicken Like A Pro method is perfect for meal prep because the resulting chicken is so moist and flavorful. Once cooked and cooled, you can slice or dice it and store it in the fridge for a few days. It’s fantastic for adding to salads, sandwiches, or quick weeknight dinners throughout the week without it drying out.
About the Author: Megan Lawrence
Hi there! I’m Megan Lawrence, and I’m all about making cooking feel approachable and joyful. With years spent developing recipes and sharing my love for food education, my biggest goal is to help you feel super confident in your kitchen. Whether it’s mastering a simple technique or creating a show-stopping dish, I believe great food should be accessible to everyone. You’ll find my recipes and tips right here at grevva.com, where I focus on sharing dependable, flavorful recipes that actually work for real life! For more about my journey, check out my bio here.
Connect With Us
So, how did your chicken turn out? I’d absolutely LOVE to hear about it! Did you try the butter and olive oil combo? Did it stay perfectly juicy? Drop a comment below and let me know your results, or if you have any super-specific questions, don’t hesitate to ask. You can also reach out via my contact page. Happy cooking!
How to Make Chicken Like a Pro
Ingredients
Equipment
Method
- Pound the chicken breasts to an even thickness using the bottom of a wide jar, glass, or a small frying pan.
- Lightly season the chicken with kosher salt and black pepper.
- Heat a frying pan large enough to fit the chicken in a single layer over medium-high heat. Add the olive oil or butter and swirl the pan to coat the bottom.
- Reduce the heat to medium. Add the chicken breasts and cook for 1 minute without disturbing them to lightly golden one side.
- Flip each chicken breast over. Reduce the heat to low.
- Cover the pan with a tight-fitting lid. Cook for 10 minutes without lifting the lid.
- Turn off the heat (or remove the pan from an electric stove). Reset a timer for 10 minutes and leave the chicken breasts in the covered pan without peeking.
- Uncover the pan. Use an instant-read thermometer to check the internal temperature. The chicken should be at least 165°F (74°C). Slice and serve.
Notes
Tried this recipe?
Let us know how it was!Megan Lawrence is a seasoned Recipe Developer, culinary writer, and digital food educator dedicated to helping home cooks discover flavorful, approachable, and reliable recipes they can return to again and again. With years of experience in recipe creation, food content strategy, and cooking education, Megan has developed a trusted voice in the culinary space—known for her clear teaching style, dependable kitchen techniques, and flavorful recipes that work for real life. Today, she proudly serves as a core author at grevva.com, where she develops recipes designed to inspire confidence and creativity in every kitchen.
Megan’s culinary journey began in community kitchens and local food programs, where she worked hands-on with families to teach cooking fundamentals, meal planning, and budget-friendly recipe creation. These early years ignited her passion for food education and revealed the true mission that continues to drive her work: to make home cooking simple, joyful, and empowering, not overwhelming. Determined to reach a wider audience, she transitioned into food writing and recipe development, building a portfolio that blends practical home cooking with chef-inspired flavors.